With over 12,000 parts in the typical piano, there is a lot to consider when restoring a piano. And yet they are amazingly durable instruments that after decades of use can be brought back to like new condition, and this process can be repeated several times in their lifetime. Restoration means different things to different people. To some it means doing whatever it takes to make the piano just like new. To some it means making an old, neglected instrument playable again within a budget. And to many it falls somewhere in between. Whatever your needs, with over 40 years of experience, I can work with you to make your piano what you want it to be. And of all the things I do in my business, I am most passionate about pianos. In the "Golden Age" of the piano industry before radio and television, factories employed artisans who took genuine pride in making fine instruments. There was fierce competition among the major manufacturers to produce the best instruments they could, and craftsmen made lifelong careers out of their craft. I never fail to get excited about bringing an instrument back to it's potential. Here you'll get to see the steps involved in a full restoration. Although most pianos don't need everything, this Knabe grand, built in 1915 and restored several times, must have had a hard life, as it needed almost everything either replaced or repaired, so it makes a good example to show what is involved.
Although not too bad if you stand far enough away and don't try to play it, this piano was the victim of some real shortcuts during it's last rebuild. Add to that who knows how many years of hard use since then, and it's ready for a proper restoration. Knabe is one of the great names in the American piano industry, and this piano has the potential to be great
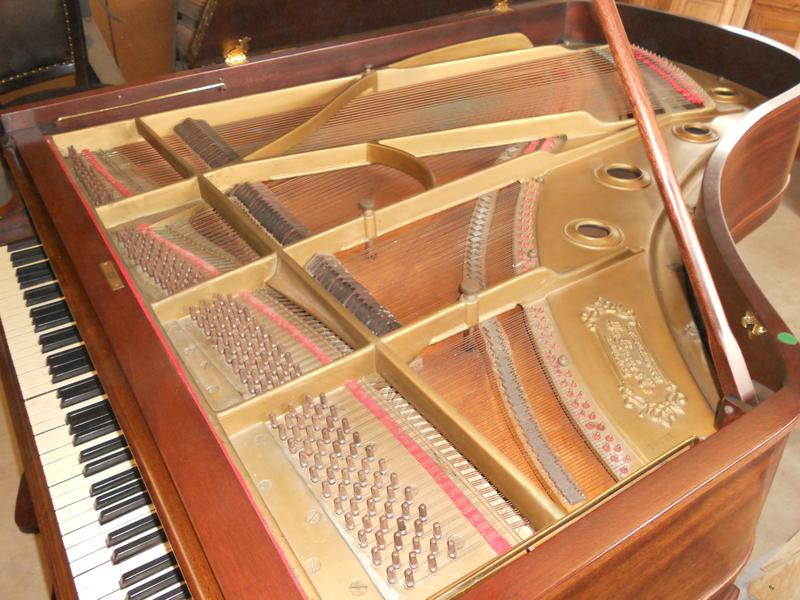
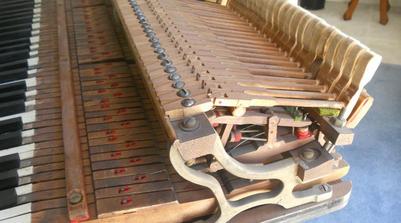
again. The last refinish was a travesty. There were large and small pieces of veneer patched into the side of the case to cover up damage. It was done in an open grain finish, which is totally inapropriate for any quality piano, and the decal with the piano's name on the fallboard was masked off and finished around. Strings were starting to break from years of corrosion, and the soundboard had new cracks as well as old cracks that were poorly repaired. The action was worn and out of adjustment and hammers had been replaced with inferior hammers that would never let this piano sound it's best. The first step in the restoration process after evaluating the instrument is disassembly.
After removing the action, the lid and all removable cabinet pieces, the process begins.
<--------------veneer patches-------------->
<----Decal was masked off and finished around.
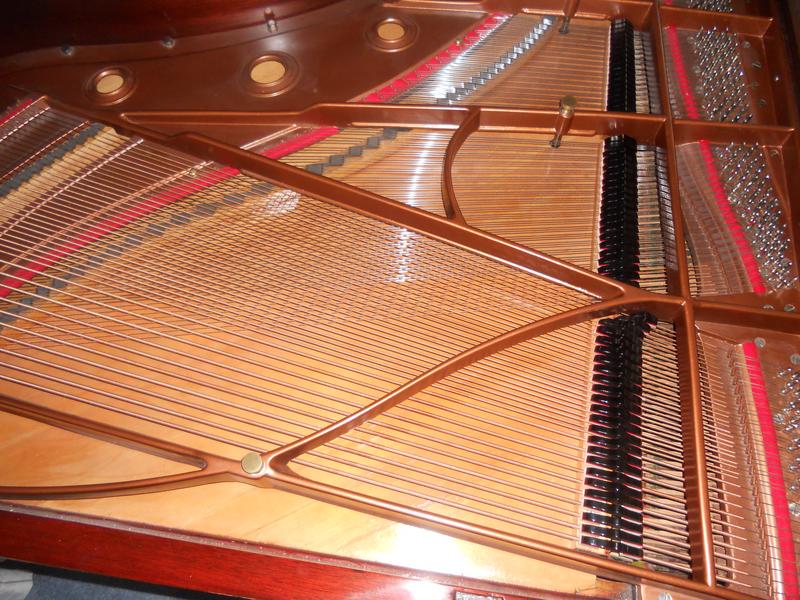
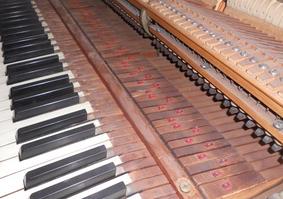
Strings starting to break.
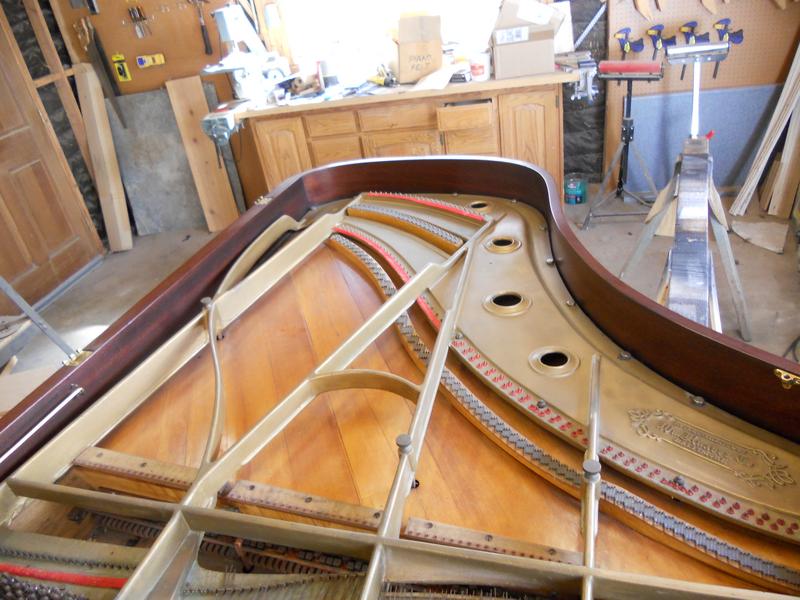
When the piano is up to pitch, there are nearly 20 tons of tension on the piano, so strings need to be removed carefully to avoid tension imbalance that could crack the iron plate.With the strings removed, we get a better look at the soundboard, and this one has some new cracks as well as some old repaired cracks that have come apart. Since we'll be refinishing both the plate and the soundboard, the plate is removed with an engine hoist for total access to the soundboard.
<------cracks---->
<----------cracks--------------->
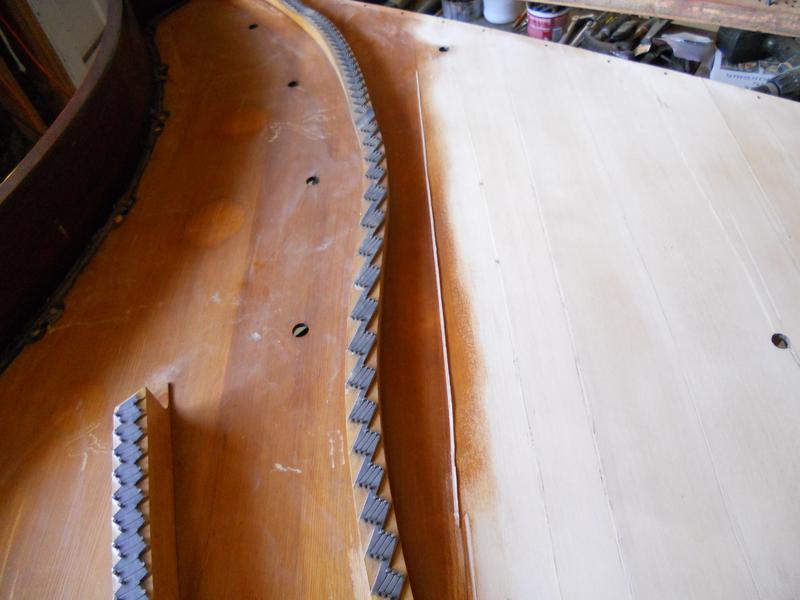
You can see the buildup of dirt and discoloration of the soundboard. Although purely cosmetic, if we're going to restore the piano, let's make it beautiful. After cleaning and sanding the board. the first step in repairing cracks is to open up the cracks to make them large enough to accept a shim. The shim is made from the same spruce wood as the soundboard for visual and tonal compatability. The shim and the crack are shaped for a perfect match, then the shim is glued into place. The shim is then sanded flush with the surface of the soundboard. After repeating this process for each crack, the soundboard is ready to be finished.
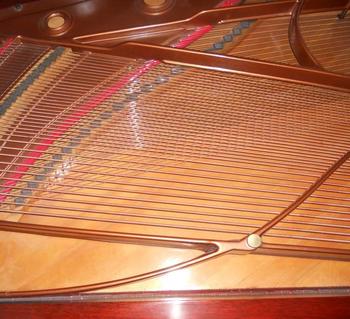
The soundboard
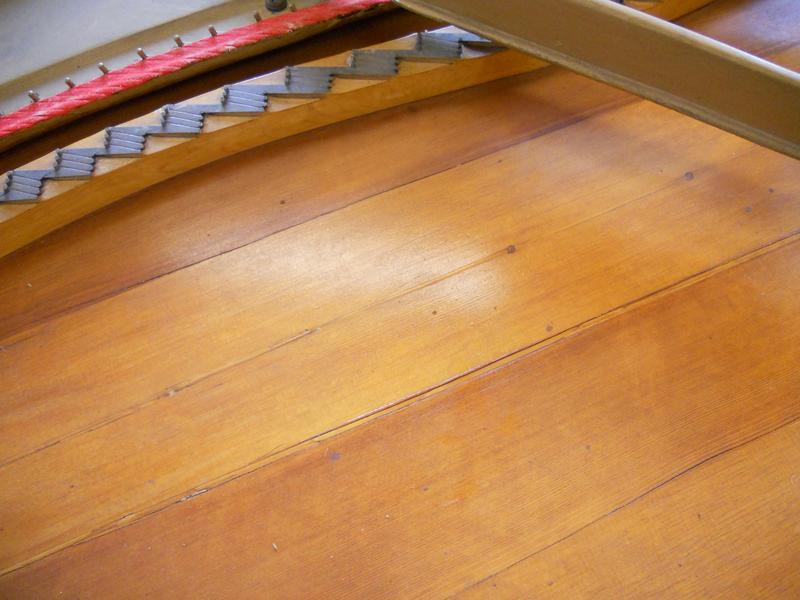
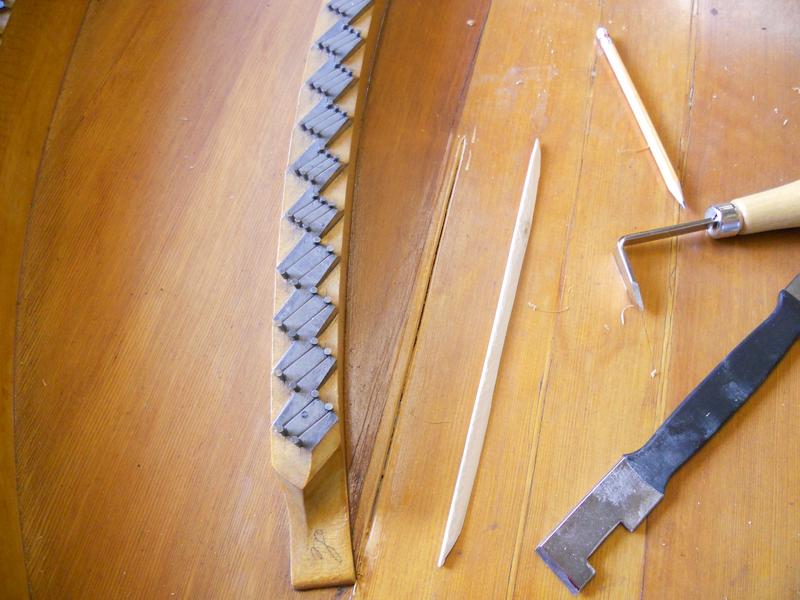
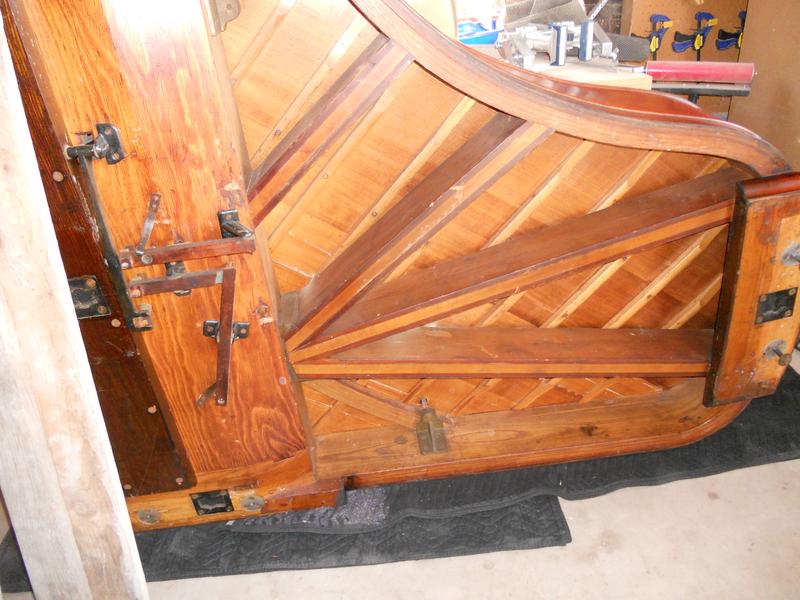
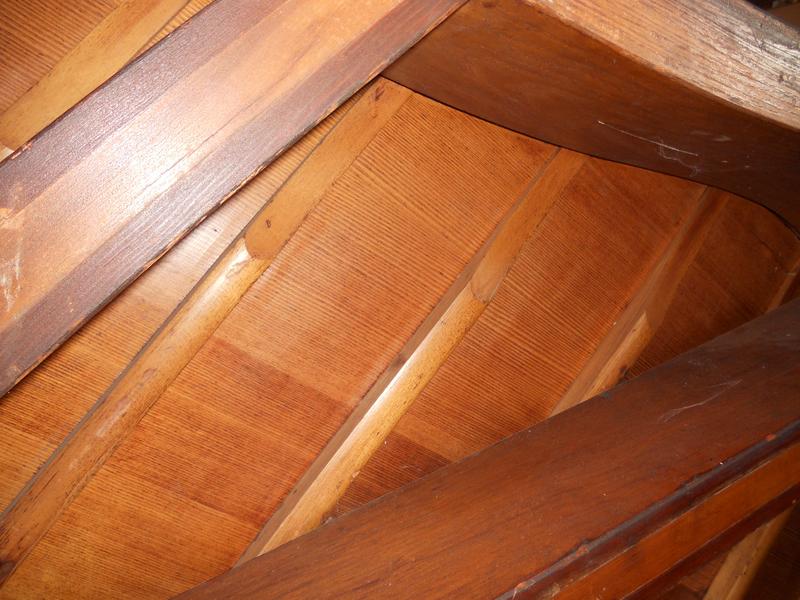
After the cracks are repaired, the piano goes on it's side to check the ribs and repair if necessary. Ribs have two purposes. Since the soundboard is only 1/4" to 3/8" thick, they give structural support to the soundboard. Additionally, they transmit the string vibrations across the entire width of the soundboard. If the glue that holds the ribs to the soundboard fails, the ribs can vibrate against the soundboard, causing a "buzzing" sound. This piano had 2 loose ribs that were reglued to restore their integrity.
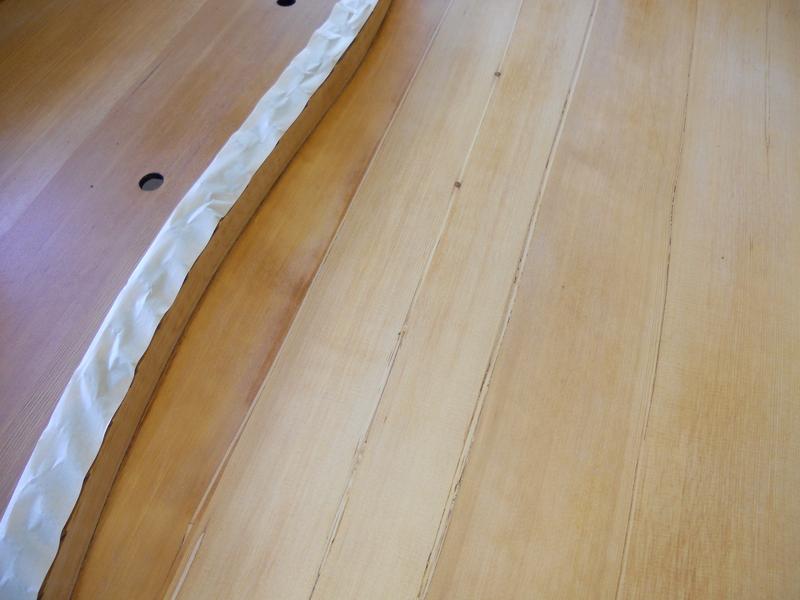
Although the soundboard is a "working part" of the piano and many technicians don't do cosmetic touchup to the soundboard, it's not that much work to touch up the repairs to make the soundboard look fresh and new again. The final finish is shown above to the right and looks new again.
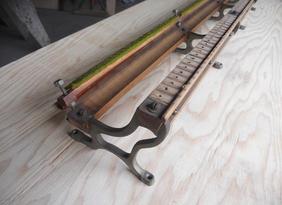
The plate
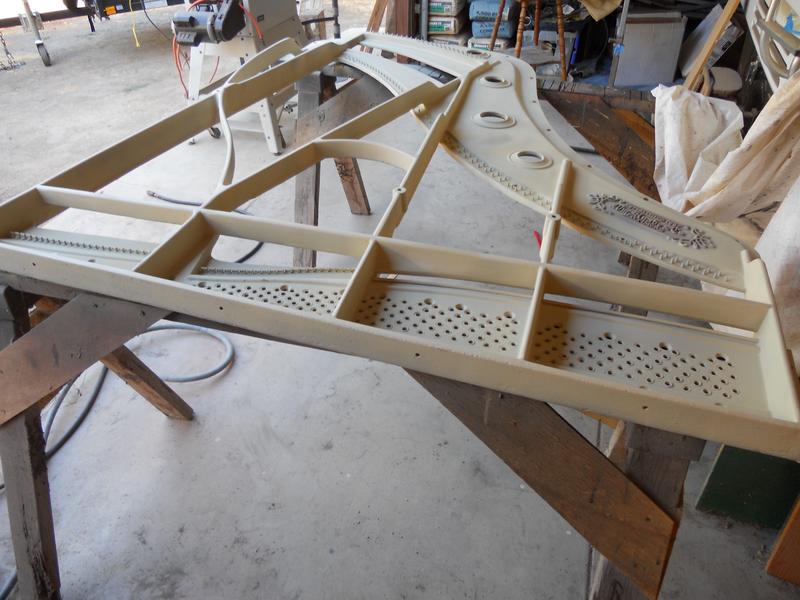
The plate is made of cast iron and supports the nearly 20 tons of tension that the approximately 220 strings exert on the the frame of the piano when it is up to pitch. Removing the plate to address the soundboard issues above afford an excellent opportunity to refinish the plate. After removing the old string felt, the plate can be prepared for finishing. I like to grind down the rough casting areas that were common on older pianos for a more "finished" look. Sanding the chipped paint from previous refinishes also makes for a better finish. If the plate is particularly rough, as this one was from numerous
rebuilds, an automotive type high build primer can be used to smooth out the casting before finishing. Below you can see the plate primed and ready for its new finish.
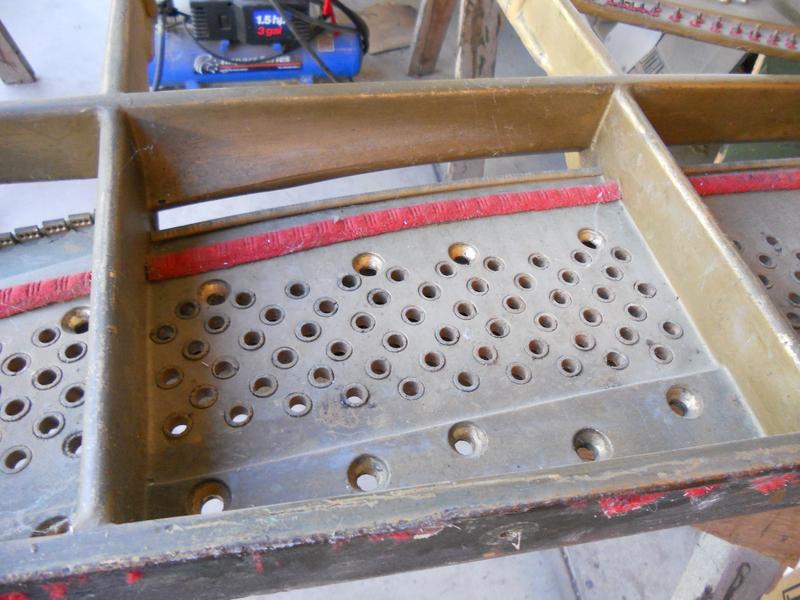
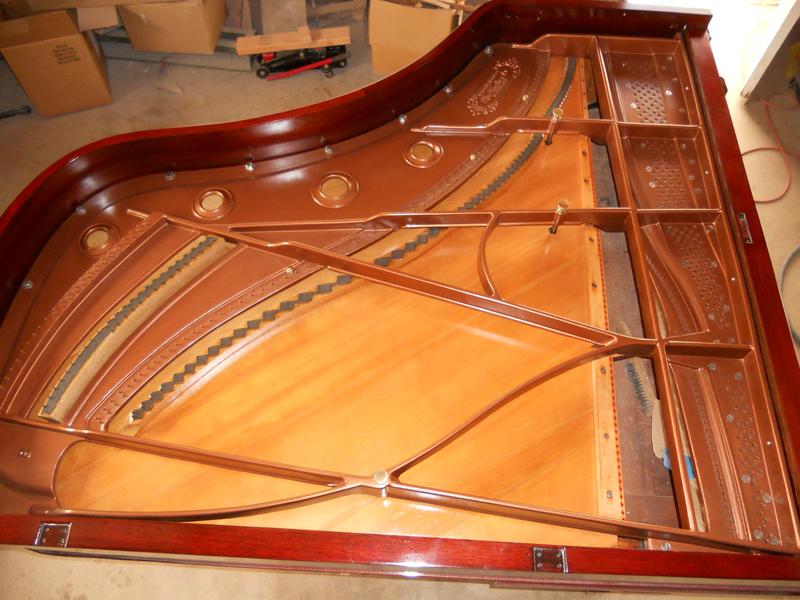
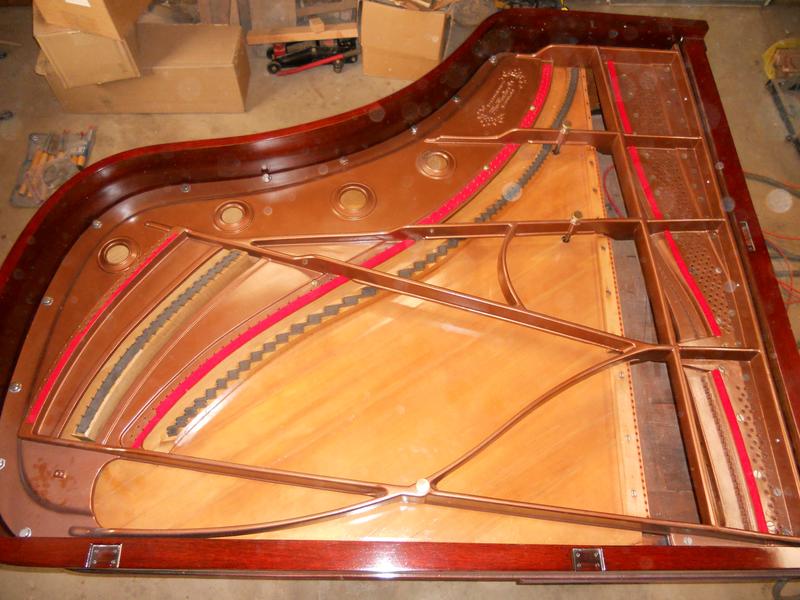
The above center picture shows the refinished plate back in the piano. While most older pianos used traditional pale gold paint, which is why most rebuilders like to refer to the process as "gilding" the plate, many newer pianos use different colors, including the popular high gloss copper metallic chosen for this piano. Above right, the understring felt has been installed to cushion the strings from the iron plate and prevent unwanted harmonics.
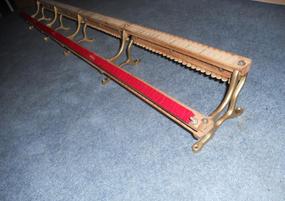
Stringing
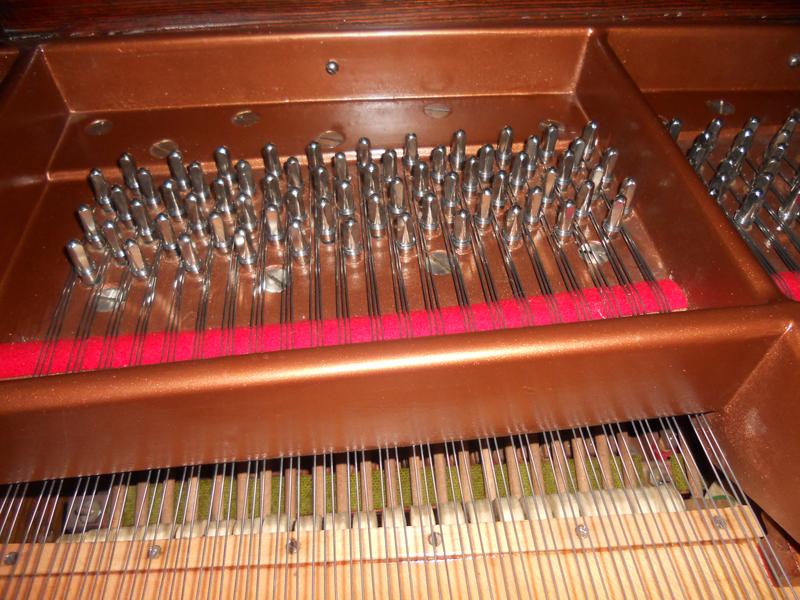
While restringing is not required on all restorations, if strings are breaking from age or corrosion, or the tuning pins will not hold the strings at proper pitch, then it is time to restring. On a grand piano, where the inside of the piano is visible, it also dramatically improves the appearance of the instrument. Also, if there are structural issues with bridges or soundboards, the only way to effect the repairs is to remove the strings, then restring after the repair. Treble strings vary in wire gauge and are cut to length from bulk rolls. Old bass strings are sent out to a specialist to be duplicated. The exception to this is Steinway, which can still provide factory strings for all their scales. The bass strings are copper wire wrapped around a steel wire base. The underlying steel wire varies in gauge and length, as does the copper wire windings, and these are different for every piano. Exact custom duplication is essential to reproduce the factory scaling and preserve the tonal character of the piano. One of the hallmarks of a good restringing job is very tight, uniform coils wrapped around the tuning pins. Of course, tuning pins are replaced with restringing, and most people prefer the newer, nickel-plated pins over the old "blued steel" pins, although both are available. While many technicians like to change the pinblock with each restringing job, it is usually not necessary, as tuning pins are available in graduated sizes, and simply using a larger diameter pin almost always solves any issues with loose pins. New strings will stretch a great deal after being installed, so several tunings are required to stabilize the strings before leaving the shop.
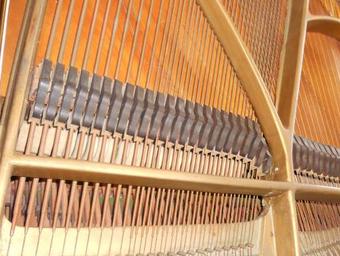
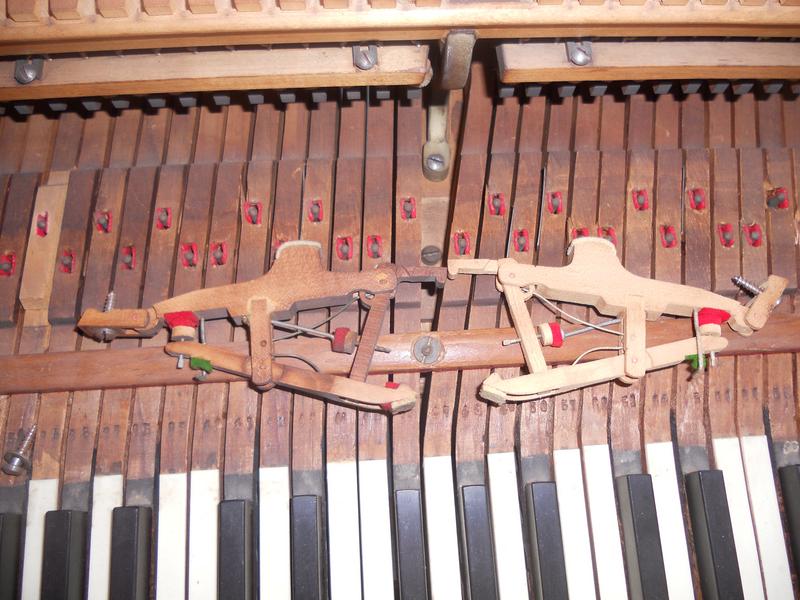
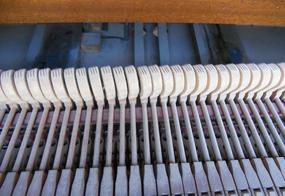
Dampers
The job of dampers is to mute the strings that are not being played. They are soft felt attached to a wooden "head". When a key is struck, the damper lifts off the strings to allow them to vibrate until the key is released. As they get old, the felt becomes hard and can buzz, or completely fail to mute the strings. When this occurs, the damper felts need to be replaced with new, soft felt. At that time, the heads are usually refinished to restore their appearance.
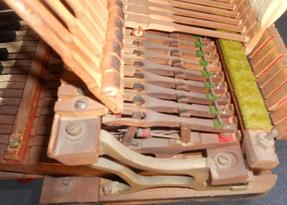
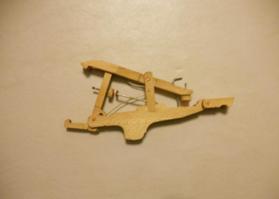
Action, hammers & keyboard
The action contains most of the 12,000 parts in the piano, and while the keys are made of soft basswood, the moving parts of the action are generally made from very hard maple, and can hold up to generations of hard use. Broken action parts are most often caused by inexperienced technicians rather than actual hard use. The "soft" parts of the action, that is the felts and buckskins, do wear out and need to be replaced after a period of time, and here you'll see what's involved in rebuilding an action. Action rebuilding is quite time-consuming and many technicians prefer to replace complete actions rather than rebuild, and sometimes that is advisable, depending on the condition of the action, but savings of from 30% to 50% can obtained by rebuilding what you've got if it's structurally sound. When properly done, performance can be as when the piano was new.
With the hammers up out of the way, you can see the wippens with worn out felt and years of accumulated dirt embedded in the wood.
With 2 of the wippens removed, you can see how media blasting the wood restores it's appearance to new, and replacing the worn out felt renews it's performance to new.
With the action removed from the keybed and stripped of it's components, it too is ready to be rebuilt.
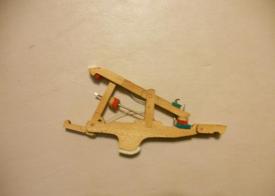
With the wood rails media blasted, the action brackets refinished, and new hammer rest felt in place, the action is ready to be assembled.
"Naked" wippens, with the felt removed and media blasted, are ready to be rebuilt.
The old wippens are now "dressed" with new felt, inspected for structural integrity and smooth operation.
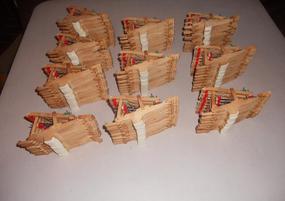
88 rebuilt wippens ready to go back in the action.
On this piano, the keys also had embedded dirt, and needed new keytops , and the sharps and flats refinished.
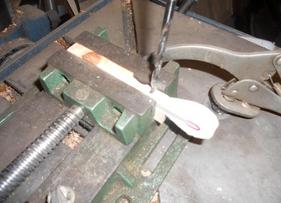
The hammers had been replaced with inferior hammers and were badly grooved from years of use.
Hammers need to be individually fitted to the piano so the striking face is perpendicular to the strings. Unless you can get factory hammers for your piano, the only way to get proper fitment is to custom-drill the hammers for the correct angle of each set of strings.
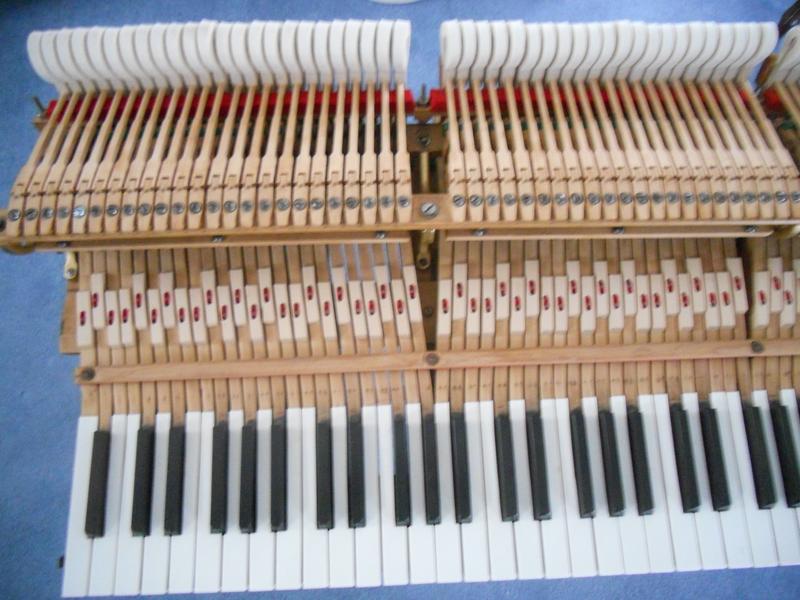
Here is the completed keyboard and action, and after proper adjustment (regulation), looks and performs as new.
CALL TODAY for a free estimate! 951-255-6138
or email photos of your project: paul@paulsfurniturerestoration.com
The Case
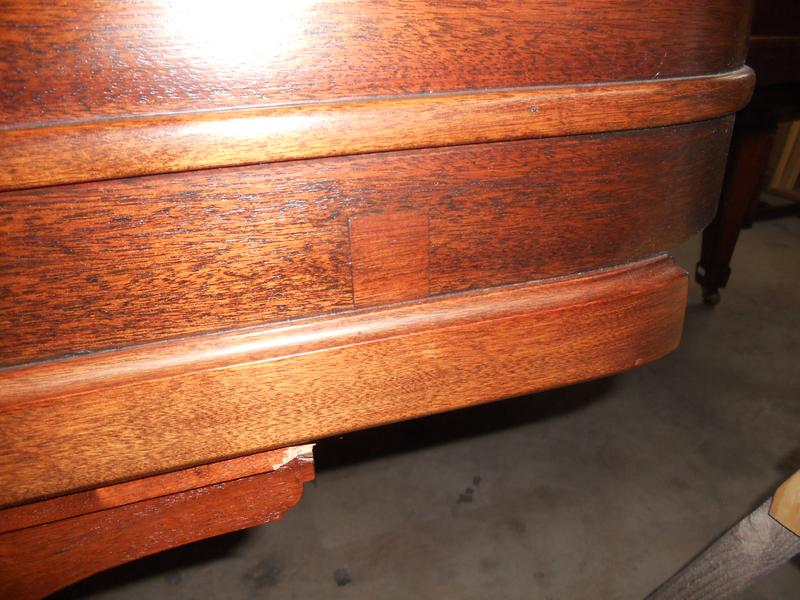
<--bad veneer patch
<--bad veneer patch
<-- bad veneer patch
<--deep gouge in wood
<--bad veneer patch
<--deep gouge
This piano provided an excellent opportunity to show what can be accomplished with a very rough piano. This piano obviously had a very busy life, with numerous rebuilds of questionable quality and workmanship and bandade-tyoe repairs throughout it's life. Yet the original quality of the piano was able to be restored to like new. Most pianos built in the late 1800's and early 1900's, known as the :"Golden Age" of pianos, were built to a quality standard that is rarely seen today. Manufacturers competed for prizes and awards for musical excellence and quality, and even obscure, relatively unknown brands produced beautiful instruments that retain superb musical and antique value. Since very little has changed technologically in the piano industry in the last 100 years, an old piano can be an excellent investment in both musical performance and the character and history that comes with age.
The last refinish of this piano didn't include a new decal on the fallboard. The name was merely masked off and finished around the old decal.
Although the history of this piano is not known, it obviously had a tough life, with case damage that was poorly repaired with veneer that didn't match it's surroundings.
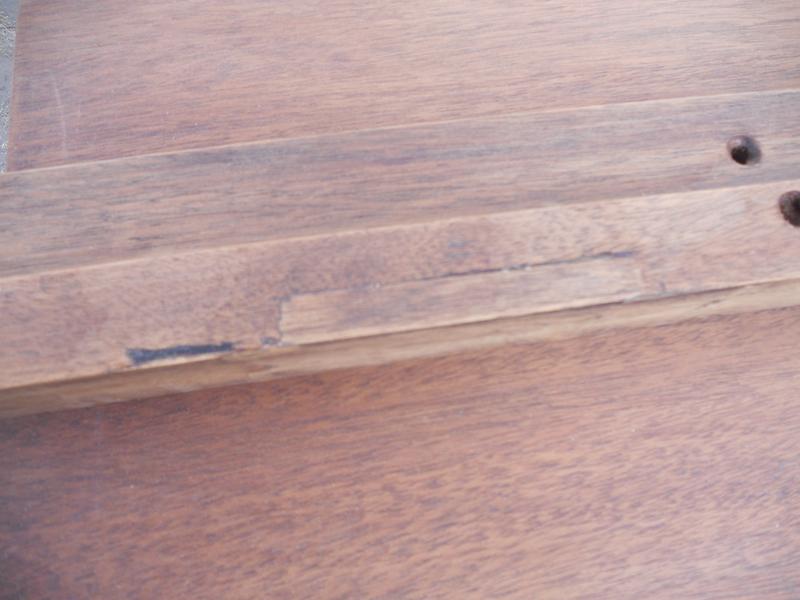
After stripping off the old finish, more damage and poor repairs were revealed.
Yet more poor repairs and damage.
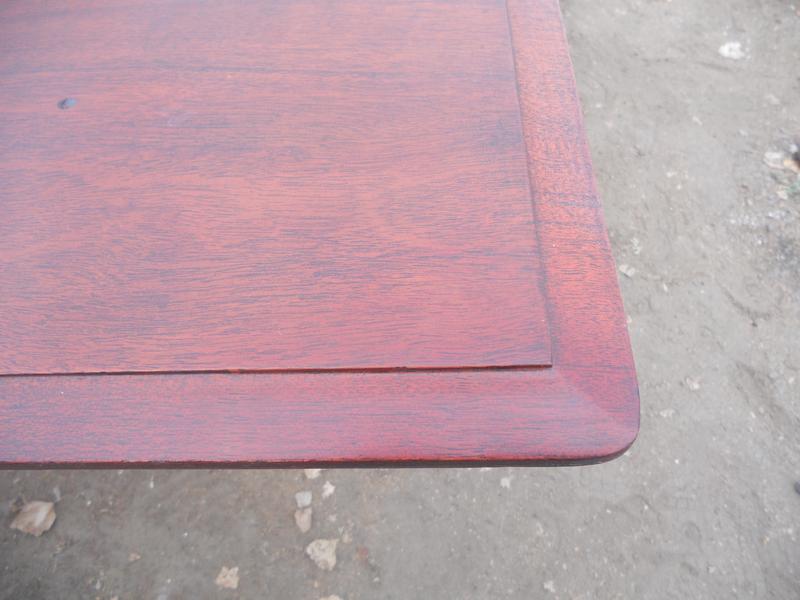
After proper repair and touchup of the edge of the lid, there is no evidence that anything was ever wrong.
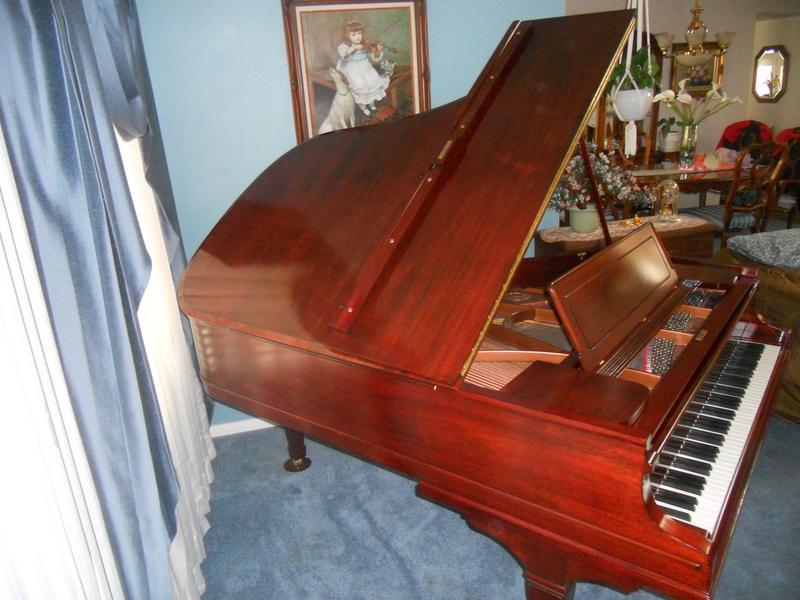
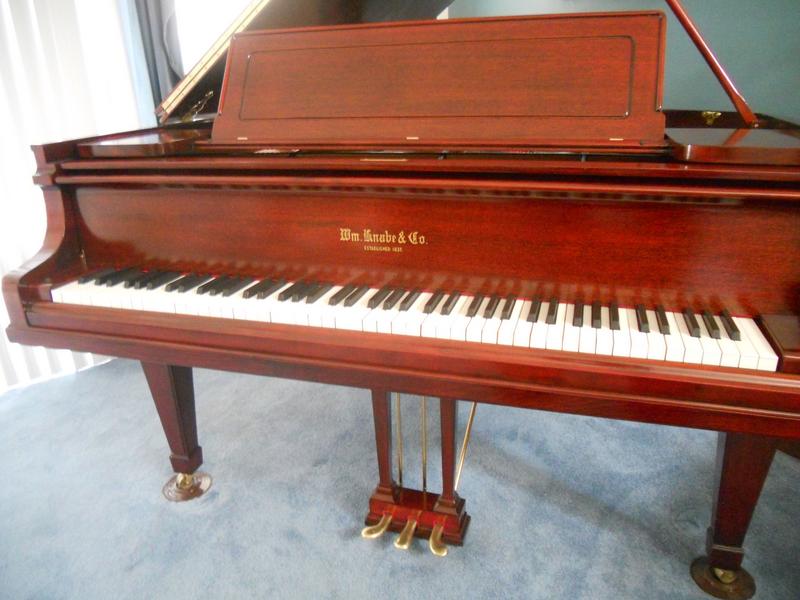
With everything repaired, restored and refinished, this beautiful piano is now back to it's original beauty and performance. The custom mahogany finish adds a touch of elegance that elevates it above the average. And even with all the additional work required to bring this piano back from the dead, it was still substantially less expensive than replacing it with a new piano of lesser quality, with the added bonus of having a hand-built instrument with character and history.
Custom Finishes
Custom finishes are available in almost anything you can imagine, from nothing more than changing to high-gloss or low-sheen finish, to custom colors and stains to match other pieces in your home. Also, 2 tone finishes are available, with part of the piano finished in a solid color, such as satin or high-gloss black, and part of the piano finished in a stained wood. If you can imagine it, I can create it.
Serving all of Los Angeles County, Riverside County, Orange County, San Bernardino County, and San Diego County!
Serving all of Los Angeles County, Riverside County, Orange County, San Bernardino County, and San Diego County!